
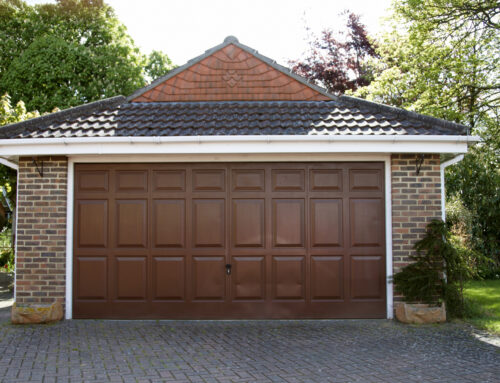
Are your garage door springs not quite up to snuff? If so, here’s how to replace a garage door spring like a professional!
Did you know that there are 317 garage door installation businesses in the United States in 2021? When you have any issue with your garage door, like a broken spring, there is someone to call.
If you want to learn how to replace garage door springs instead of calling in a professional, they are a few considerations you must make before tackling the project.
Replacing a garage door spring on our own can save you money, but is it worth the hassle? The following considerations can help you learn about what exactly you are getting yourself into.
The Different Types of Garage Door Springs
The first step to replacing your broken garage door spring is to figure out the type of spring you have. Springs fall into two categories: extension springs and torsion springs.
Extension Springs
Extension springs are long and skinny. They run parallel to the door’s horizontal tracks. When the door gets moved, they extend or stretch out to store energy.
You could have any of the three types of extension springs.
Open-Looped Extension Springs
An open-looped extension spring is a weak style of extension. You have to have an open wire at the end this spring can rely on.
If the wire breaks, the entire spring needs a replacement. You cannot only fix the wire.
Double-Looped Extension Springs
These are stronger than open-looped springs because they have two coils. Both coils connect to the eyebolt and the pulley.
Clipped-End Extension Springs
This is the most robust of the three extension spring options. Garage doors weighing more than 200lbs use them because they are strong and can last long.
Torsion Springs
Depending on the size, strength, and weight of the garage door, it will have between one and four torsion springs. They are located on the metal shaft above the opening of the door.
On either end of the metal shaft, aluminum drums are placed. Springs are wound to a specific torsion setting based on the assembly.
There are four main types of torsion springs.
Standard Torsion Springs
These are more commonly found on residential garage doors. A light door only needs one spring to operate effectively.
Early-Set Torsion Springs
Standard torsion springs and early-set torsion springs are similar. The difference is that early-set torsion springs get mounted in the middle of the shaft.
Steel Rolling-Door Torsion Springs
A steel rolling-door torsion spring is for commercial and industrial buildings more often than not. Within the torsion barrel, these springs are contained.
Torque-Master Torsion Springs
These springs are enclosed in the torsion shaft and have a cone that sits at the end of each torsion rod.
A torque-master torsion spring along with a steel rolling door torsion spring are used for heavier garage doors for commercial and industrial applications. You most likely won’t be replacing these two torsion spring types in your residential home.
Finding Replacement Springs
When you know you need a garage door spring replacement, you must find replacement springs right away. Luckily, this part of the job is easy.
As long as you know which type of spring you need, you can find garage door extension springs or torsion springs at various hardware stores or online.
If you don’t know what you are looking for, it may be better to get springs from a garage door repair company. These professionals can answer questions you may have to help you further in your project.
Proceed With Caution
A garage door replacement spring can be hazardous to replace on your own. However, the type of spring you have changes the hazard level.
During an extension spring replacement, be wary of falling garage doors, activated openers, and rusted metal. Old or rusted metal can cause minor, but annoying cuts.
These springs are easier to replace, but you should still have a basic knowledge of garage doors before doing the project on your own.
Torsion springs are under more tension and can be riskier to replace on your own. If a winding cone or spring breaks, you could be dealing with flying metal.
The risks of this DIY project include falling garage doors, activated openers, and cuts due to metal. However, the cuts from a torsion spring replacement can be more severe.
Unless you are a DIY expert, you should leave torsion spring replacement to the professionals.
Replacing Extension Garage Door Springs
To replace an extension garage door spring, you must open the garage and remove the spring tensions then clamp them in place. After they are in place, disconnect the opener.
Mark the current placement of the pulley so you can install it in the same spot. You can do this with tape or a pencil mark.
Disconnect the spring from the spring pulley and track the bracket. Disconnect the safety cable that is threaded through the spring. Remove the old or broken spring.
When you have a new spring that matches the old one, you can thread the safety cable through the new spring then attach it to the track bracket. Then, reattach the safety cable and pulley.
It is critical to make sure the wiring from the pulley is away from the safety cable. Install the pulley in the correct location that you marked.
Lastly, you’ll remove the clamps and connect the door opener. You can check that the replacement worked by testing the garage door.
Replacing Torsion Garage Door Springs
Replacing a torsion spring should only be done by professionals or an experienced DIYer.
To begin, unplug the opener and clamp the door to the track so that it cannot open. You’ll need a ladder to change the torsion garage door springs.
Use a winding bar and insert it into the winding cone so that the spring can be held in place. At least one bar should be in the cone at all times to avoid injury.
Lower the winding bar and insert a second one. Remove the first winding bar then lower the second one. Keep repeating these steps until the spring is unwound completely.
Remove the torsion hardware securing the stationary torsion cones. Remove the springs, cable drums, and cables.
Slide the new springs into the torsion tube then reinstall the cable drum. Then, install the center bearing and the new spring on the opposite side. Tighten the drums and thread the cables.
The tension must be equal on both sides or else the garage won’t open evenly. Use the winding bars to wind the new spring in. A supplier will recommend how many turns you need.
With a garage door lubricant, lubricate the spring before removing the clamp. Lift the garage door by 3 feet to test it. If the door falls, the spring needs to be tightened more.
How to Replace Garage Door Springs Explained
Learning how to replace garage door springs is not that difficult unless you are inexperienced with DIY. Extension springs are easier and safer to replace on your own than torsion springs.
By using this guide, you can decide if you think you’ll be able to replace garage door springs on your own. If not, schedule a garage door repair appointment with our experts now.


Leave A Comment